
When it comes to producing stickers, proper set-up can help streamline your workflow and save you valuable production time. Here are two cut settings in Adobe Illustrator and Roland DG VersaWorks that will help you increase efficiency and reduce waste when printing stickers and decals.
In Adobe Illustrator
The PerfCutContour Swatch
If your customers are looking for individual stickers, creating a “PerfCut” (a perforated cut line through the liner) will reduce time spent weeding and trimming finished prints. Creating a new custom swatch in Adobe Illustrator called “PerfCutContour” is a great shortcut and you’ll be able to use this feature time and time again.
Follow these easy steps to create your new swatch:
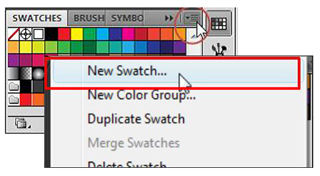
- With Illustrator open, select the drop down menu from the swatches library and select “New Swatch.”
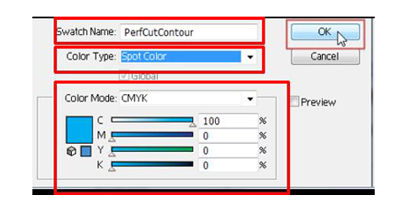
- In the “New Swatch” dialogue box, change the Swatch Name to “PerfCutContour” making sure to capitalize the “P,C, and C,” and delete any spaces (the name should appear as it does above).
- In the same dialogue box, using the “Color Type” drop- down menu, select “Spot Color” and define a color value for the PerfCutContour swatch using the CMYK value sliders. Then click OK to save. The PerfCutContour swatch should now be available in the Swatch Library.
A quick tip for improving cut quality: Place a Contour Cut line directly on top of the artwork that will be PerfCut. Doing so will tell the printer to perform a contour cut first, before proceeding with the PerfCut. This will ensure that the PerfCut is completed on the backing material only, leaving your printed piece free from the little tags left behind when a PerfCut is performed.
In Roland DG VersaWorks
The Custom Cut Function
The Custom Cut function can help improve workflow and cut accuracy on longer print and cut jobs by allowing the user to divide the job into smaller segments, resulting in greater print/cut registration accuracy. Before getting started, make all of your desired settings for the job: number of copies, size, quality, etc. Once all of the settings are dialed in, follow the steps below to set up the job with Custom Cut.
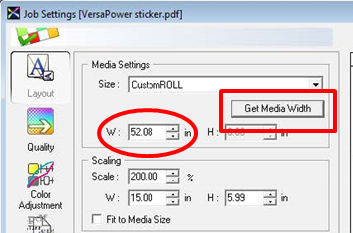
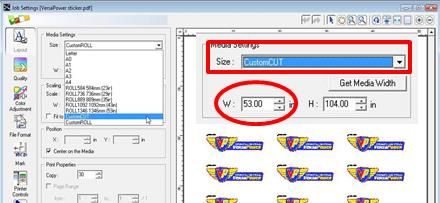
- Under the “Layout” tab in VersaWorks, click “Get Media Width” and record the result. You can right click and copy the width. You will need this information for the next step.
- Open the “Size” dropdown menu and select “Custom Cut.” Notice that the width has changed back to the default width. You can right click into the “Width” area again and select “paste” to enter the correct width of the material copied during the previous step.
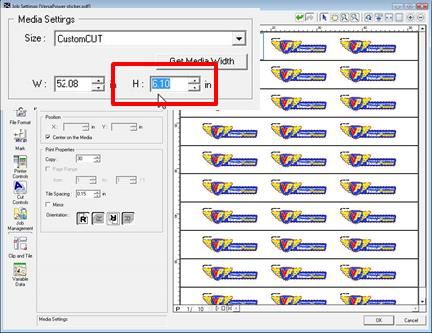
- The next step is where we will break the job into manageable-sized rows. To do this, change the height in the “Media Setting” field to be slightly higher than the height listed in the “Scaling Field.” In this example, we’re working with an image height of 5.99 inches, so I’m going to enter the “Media Setting” height as 6.10 inches. The job preview to the right will change to reflect each row as a different page. VersaWorks will process each row as its own print/cut job which, in turn, will increase print and cut registration accuracy over the entire run.
These tips were covered in this week’s Roland DGA Academy webinar: “Making Stickers with your Roland DG.” To see upcoming webinars and access our archive for Roland DG owners, please click here.
